How Can We Help?
Creating an Event
Creating an Event
To create an event/fixture you will need to follow the below steps, please note this can only be done from the website. You cannot create a new event/fixture from the mobile app.
Firstly you will need to go to Teams & Events > All events button. Following this you will need to select ACTIONS > Create Event
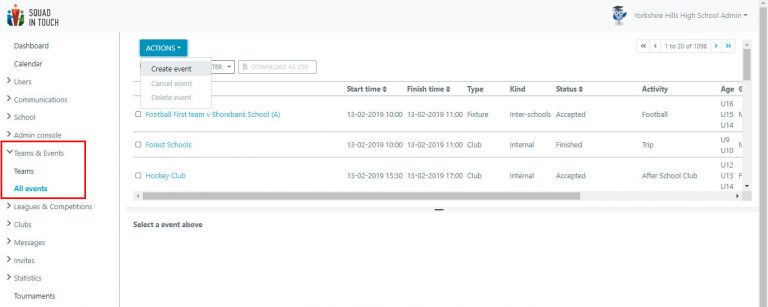
This will then pull up the event creation form.
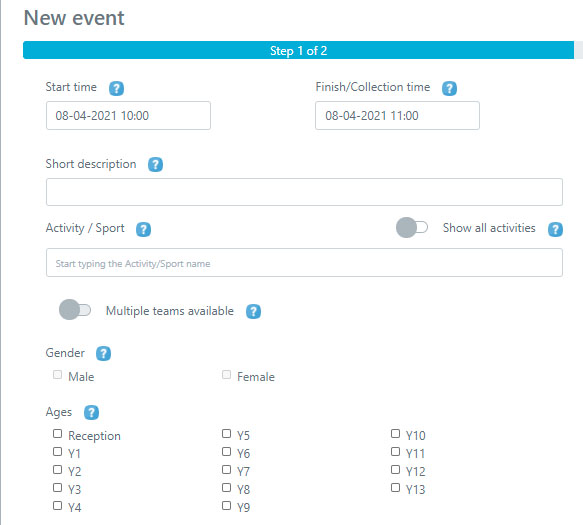
- Start / finish time: this will be when your event takes place, if you have enabled student clashes then when selecting your team sheet it will use a traffic light system to show which students are available.
- Short description: This will be how the event appears within everyones calendar, if you would like a name to be automatically generated you can leave this blank.
- Activity / Sport: here you will input the sport or activity that is taking place. You may have Favourite activities set up, if this is the case you can turn on the SHOW ALL ACTIVITIES option, which will show all events. Initially only so many options will be shown, just start typing in your chosen sport / activity and it will appear within the list of options.
- Multiple teams available: this button will determine if you have multiple teams taking part in the event to create a tournament, or if you are just doing the ‘generic’ set up, i.e football just 1v1 or Cross Country just 1 teams.
- Gender: you can select one or all genders
- Ages: Here you can select multiple age groups or just one. If you leave all year groups blank then this will enable all years to be selected within the team sheet
Next you will need to determine the type of event that is taking place, you have three options to choose from:
- Inter-Schools: This will enable you to choose an opposition school, simply start typing the opposition school in the box that will be provided. You can use the ‘Maximum distance’ box to provide a radius of how far the school is, incase their are multiple schools with the same name. If you are unsure of which school you will be playing against or how many schools will be taking part you can simply select TBD and add your opposition school(s) at a later date.
- House: This will allow you to choose from the houses that are within your schools system
- Internal: You will be able to select any student from your school who fits the criteria to go in your team(s), all teams will be from your school

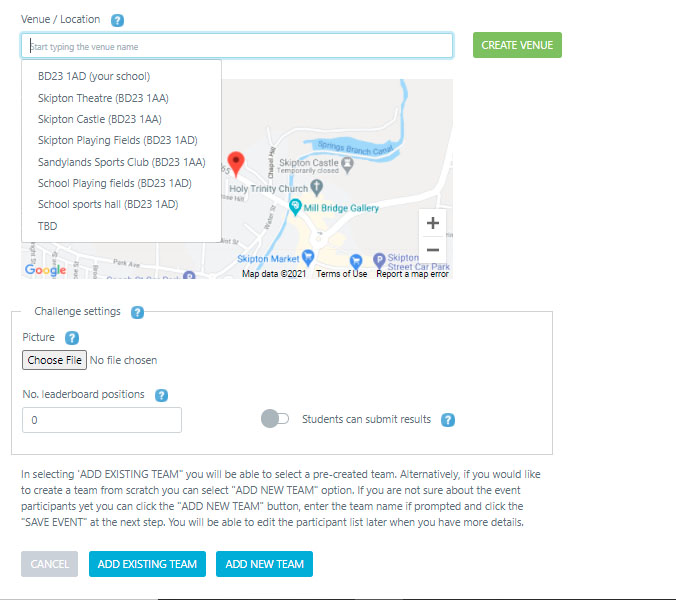
You will now need to select where the event is taking place. If you do not know yet you can simply select TBD and you can choose your venue at a later date.
You can add your own saved venue if it is a regular place, or you can add specific locations within the school if you would like, you can do this by selecting Create Venue. Please see the guide on creating a venue on how to do this in more detail. Once you have created your initial set up of your fixture / activity you can then choose to select ADD EXISTING TEAM or ADD NEW TEAM
NB: prior going to the next section you will see an area for ‘Challenge settings’ this section will need to be ignored if you are creating a fixture / activity, if you would like to create a challenge then please see the relevant guide on how to do this LINK
Add existing team: will enable you to select from your pre-created teams that are already on your Squad in Touch account, please see a separate guide on how to create teams. If you have an existing team you would like to add then it will need to match the event criteria exactly: event type, gender(s) and age(s).
Add new team: This will allow you to create a new team based on the criteria you have selected within this form: gender(s) and age(s).
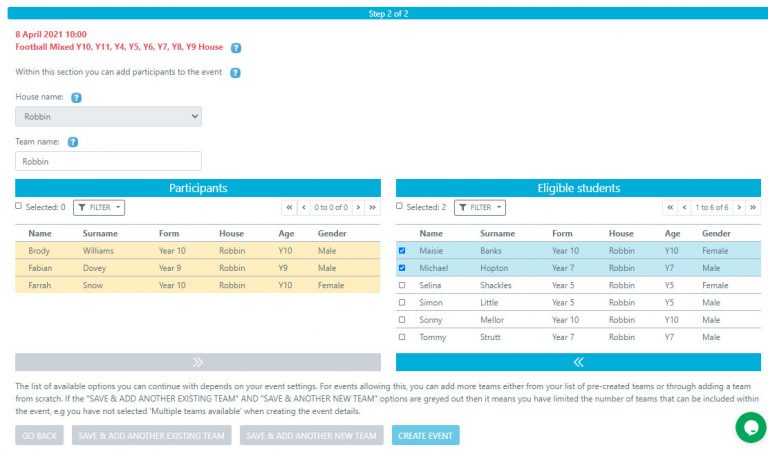
Adding your team(s)
On the next screen you will see a list of students who fit the criteria, providing you have students already added to Squad in Touch – if not please see a guide on adding students.
In the below example we have created an event based on HOUSES, therefore if you have used another criteria you may not see the House Name box. You can now input your TEAM NAME and select students by using the check boxes and the arrows below to move them in / out of your team.
If you decide to use the filter option to sort through students then please note that when you create a new filter it will refresh the checked students.
Once you have selected your first team you then have three options:
- Save & Add another existing team: This will enable you to add one of your pre-existing teams
- Save & Add another new team: This will allow you to create another team from scratch
- Create event: You will only be able to do this when you have created the minimum number of teams needed to created the event.
If you are not yet ready to add your students to a team you can just name the teams and then create the event, students can be added and changed whenever you need.
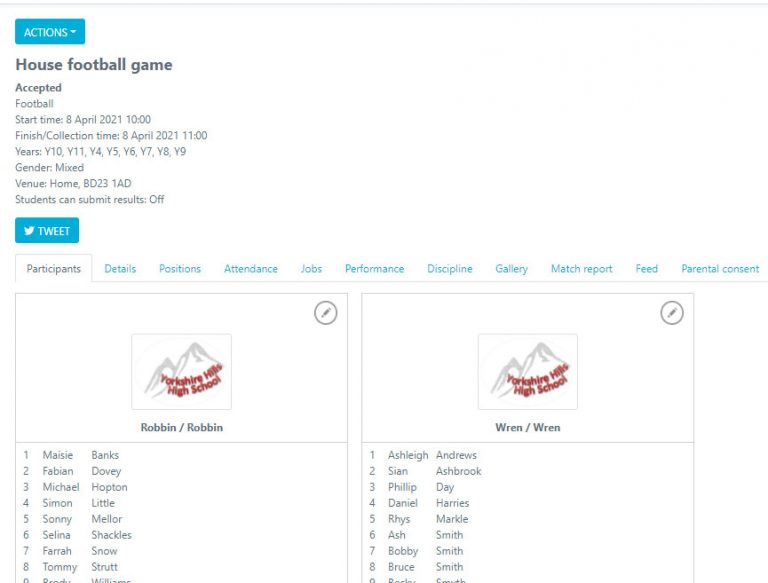
You have now created your event and you will be redirected to the event page. To see all you can do from here make sure you have a look at our guide on managing a fixture LINK